Client-side routing has transformed how we build web applications. React Router stands as the most popular routing solution for React apps. Yet many developers struggle with a critical challenge.
Search engines have difficulty crawling single-page applications. This creates real problems for your website visibility. Your carefully built features might never reach your target audience.
The latest version of react-router-dom v6 brings powerful new features. These features can help solve SEO challenges when implemented correctly. This guide shows you exactly how to optimize your routing for search engines.
We will explore advanced techniques that go beyond basic setup. You will learn server-side rendering integration, proper meta tag implementation, and how to handle redirects. Each strategy comes with practical code examples you can use immediately.
Foundation Check: This guide assumes you understand React fundamentals and have basic react-router-dom experience. If you need a refresher on React Router basics, the official documentation provides an excellent starting point.
Understanding Client-Side Routing and SEO Challenges
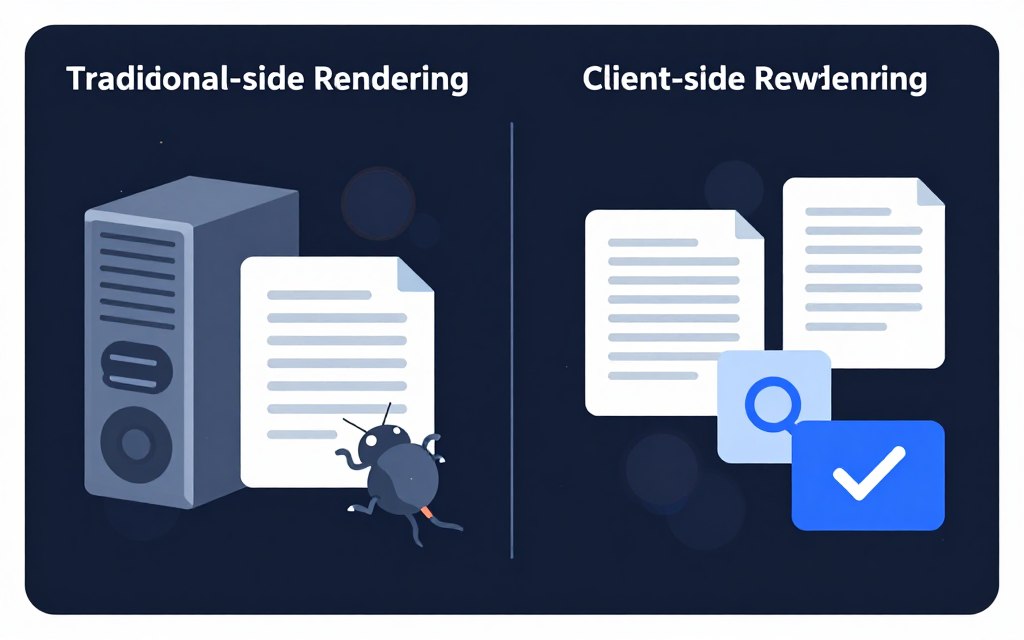
Traditional websites send complete HTML pages from the server. Each page contains all content visible to search engines. This approach works perfectly for SEO because crawlers receive fully rendered content.
Single-page applications work differently. The server sends a minimal HTML shell. JavaScript then takes over to render content and handle navigation. This creates a fundamental problem for search visibility.
How Search Engines Process Web Pages
Search engine bots follow a specific process when crawling websites. They request a URL and wait for the server response. The bot then parses the HTML content it receives.
Modern search engines can execute JavaScript. However, this process requires more time and resources. Google may not always wait for JavaScript to complete execution.
The crawler needs to see your content immediately. Any delay in rendering can result in incomplete indexing. This affects your search rankings and visibility.

Common SEO Problems with Client-Side Routing
React Router manages navigation without full page reloads. This creates several SEO challenges that developers must address. Understanding these issues helps you build better solutions.
Content Visibility Issues
JavaScript-dependent content may not appear to crawlers. Search bots might see an empty page shell instead of your actual content. This results in poor or zero indexing of your pages.
Meta Tag Management
Single-page apps need dynamic meta tags for each route. The initial HTML often contains only generic meta information. Search engines may use incorrect titles and descriptions for your pages.
URL Structure Problems
Client-side routing can create URLs that search engines cannot properly index. Hash-based routing particularly causes indexing issues. Modern React Router uses browser history API, but implementation matters.
Loading Performance
Large JavaScript bundles delay initial content rendering. Search engines prefer fast-loading pages. Slow time-to-interactive scores hurt your SEO rankings significantly.
The Impact on User Experience and Rankings
SEO problems directly affect your business results. Users cannot find your content through search if it is not properly indexed. This reduces organic traffic and potential conversions.
Google uses Core Web Vitals as ranking signals. These metrics measure loading performance, interactivity, and visual stability. Poor client-side routing implementation negatively impacts all these metrics.
Your competitors using traditional server-rendered sites may rank higher. This happens even if your application provides better functionality. Search engines cannot evaluate what they cannot see.
Key Insight: The goal is not to avoid client-side routing. Instead, you need to implement it in a way that serves both users and search engines effectively. React-router-dom v6 provides the tools needed for this balance.
How react-router-dom v6 Handles Routing and Search Engine Crawling
React Router version 6 introduced significant architectural changes. These changes affect how your application interacts with search engines. Understanding the core mechanisms helps you optimize for better SEO performance.
Core Routing Mechanism in Version 6
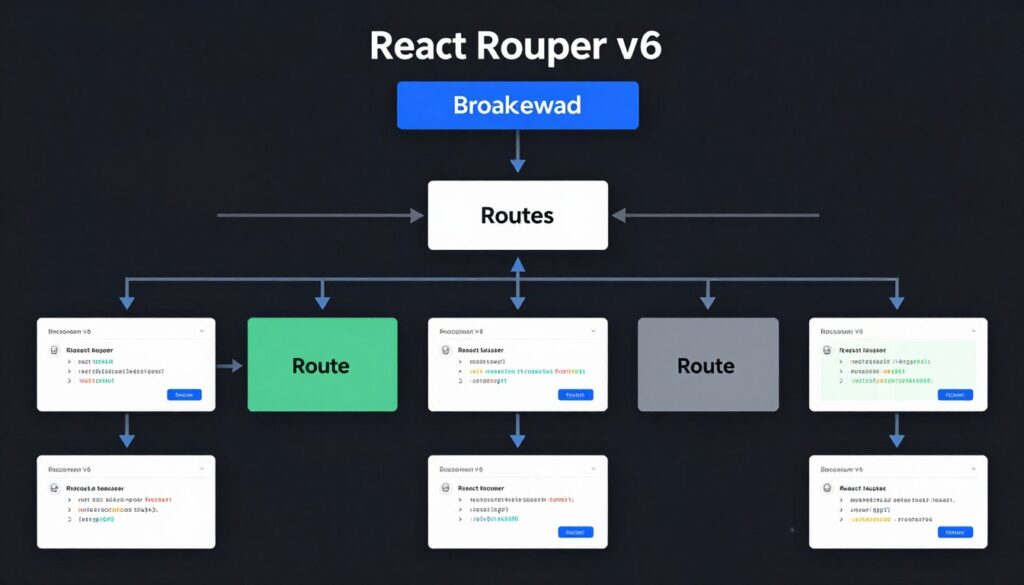
The router in version 6 uses a data-driven approach. Routes are defined as configuration objects rather than nested component trees. This shift provides more control over routing behavior and data loading.
The BrowserRouter component manages the browser history API. It updates the URL without triggering full page reloads. Each route change modifies the browser history state while rendering the appropriate component.
import { BrowserRouter, Routes, Route } from 'react-router-dom'; function App() { return ( <BrowserRouter> <Routes> <Route path="/" element={<HomePage />} /> <Route path="/products" element={<ProductsPage />} /> <Route path="/products/:id" element={<ProductDetail />} /> </Routes> </BrowserRouter> );
}
This code structure works perfectly for user navigation. However, search engine crawlers face challenges. They request a specific URL and expect immediate content delivery.

What Search Engines See by Default
When a search bot requests your React app URL, the server sends the initial HTML. This HTML typically contains minimal content. The actual page content exists in JavaScript bundles that must execute first.
Google and other modern search engines can execute JavaScript. But this process has limitations. The crawler must download JavaScript files, execute the code, and wait for content rendering.
The initial HTML response matters most. Search engines may not wait for JavaScript execution to complete. They need to see content immediately for proper indexing and ranking.
The Element Prop and Component Rendering
Version 6 replaced the component prop with the element prop. This change affects how components receive route information. The element prop accepts JSX elements directly rather than component references.
This new approach simplifies passing props to route components. However, it also means components render only after route matching completes. Search engines requesting a URL need the content before JavaScript executes.
// Version 6 syntax with element prop
<Route path="/blog/:slug" element={<BlogPost />} /> // Inside BlogPost component
function BlogPost() { const { slug } = useParams(); const [post, setPost] = useState(null); useEffect(() => { // This data fetch happens after render fetchPost(slug).then(setPost); }, [slug]); return post ? <article>{post.content}</article> : <Loading />;
}
The problem becomes clear in this example. The component mounts first. Then it fetches data in useEffect. Finally, it renders content once data arrives. Search crawlers may not wait through this entire process.
Nested Routes and Layout Components
React Router v6 introduced improved nested routing. Child routes render inside parent route components using the Outlet component. This creates flexible layouts but adds another layer of rendering complexity.
Each level of nesting requires component mounting and rendering. Search engines need to see the final rendered output. Multiple nested routes increase the time until content appears.
function App() { return ( <Routes> <Route path="/" element={<Layout />}> <Route index element={<HomePage />} /> <Route path="products" element={<ProductsLayout />}> <Route index element={<ProductsList />} /> <Route path=":id" element={<ProductDetail />} /> </Route> </Route> </Routes> );
} function Layout() { return ( <div> <Header /> <Outlet /> {/* Child routes render here */} <Footer /> </div> );
}
Parent route components render first. Then child components render in the Outlet location. This multi-step process happens entirely in JavaScript. The initial HTML contains none of this nested structure.
Ready to See Working Examples?
Access our GitHub repository with complete React Router v6 SEO implementation examples. Each pattern includes before/after comparisons showing the impact on search engine crawling.
URL Parameters and Dynamic Routes
Dynamic routes use URL parameters to load specific content. The useParams hook extracts these values from the current URL. This pattern works excellently for user navigation but requires special handling for SEO.
Search engines crawl each URL independently. They cannot execute the data-fetching logic tied to URL parameters. The server must recognize these parameter-based URLs and return appropriate content.
Consider a product detail page with the path “/products/:id”. When a user navigates from your product list, the app fetches product data based on the ID parameter. But when a search engine directly requests “/products/123”, it needs immediate content access.
The useLocation Hook and URL Tracking
The useLocation hook provides access to the current location object. This includes the pathname, search parameters, and state information. You can use this data for analytics and conditional rendering.
However, location-based logic executes only after component mounting. Search engines requesting a specific URL do not trigger this client-side code execution. Your SEO strategy must account for this limitation.
import { useLocation } from 'react-router-dom'; function AnalyticsTracker() { const location = useLocation(); useEffect(() => { // Track page views when location changes analytics.track(location.pathname); }, [location]); return null;
}
This tracking component works perfectly for user analytics. But it provides no benefit for search engine crawling. SEO requires server-side solutions that deliver content before JavaScript executes.
Technical Note: Understanding these React Router v6 mechanisms is essential before implementing SEO solutions. The next sections show how to bridge the gap between client-side routing and search engine requirements.
Server-Side Rendering Integration Strategies
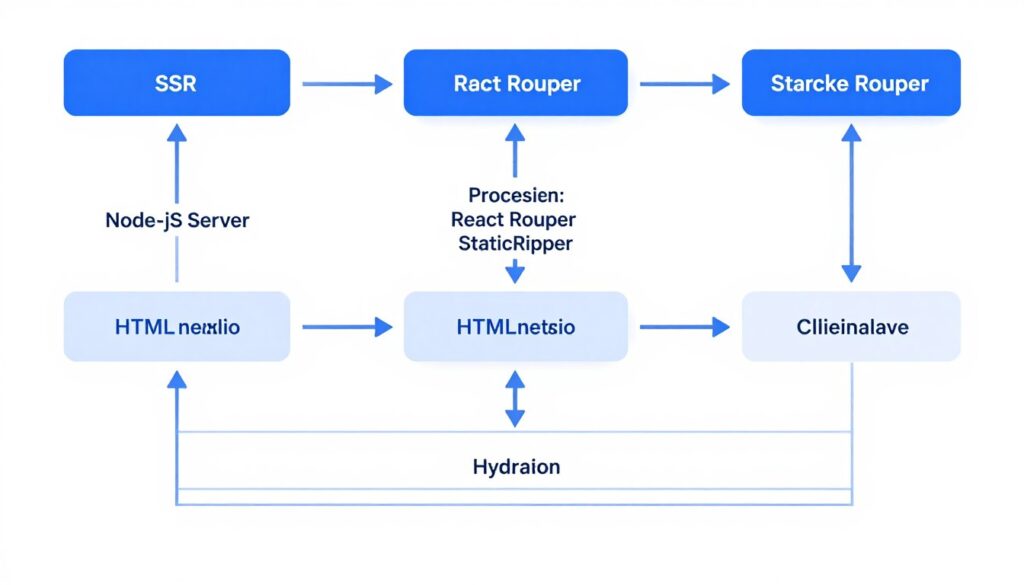
Server-side rendering solves the fundamental SEO challenge of client-side routing. SSR generates complete HTML on the server before sending it to the browser. Search engines receive fully rendered content immediately.
React Router v6 fully supports server-side rendering. You need to use the StaticRouter component on the server instead of BrowserRouter. This allows the router to work with Node.js HTTP requests.
Implementing Basic SSR with React Router v6
The server needs to render your React app to HTML strings. The StaticRouter component accepts the current request URL as a prop. It then matches routes and renders the appropriate components without browser APIs.
// server.js
import express from 'express';
import React from 'react';
import { renderToString } from 'react-dom/server';
import { StaticRouter } from 'react-router-dom/server';
import App from './App'; const app = express(); app.get('*', (req, res) => { const html = renderToString( <StaticRouter location={req.url}> <App /> </StaticRouter> ); res.send(` <!DOCTYPE html> <html> <head> <title>My App</title> </head> <body> <div id="root">${html}</div> <script src="/bundle.js"></script> </body> </html> `);
}); app.listen(3000);
This basic setup renders your app on the server. The browser receives complete HTML with visible content. Search engines can immediately see and index this content without JavaScript execution.
Handling Data Loading with SSR
Components often need to fetch data before rendering. Client-side apps use useEffect for data loading. But server-side rendering requires data to be available during the initial render.
React Router v6 introduced data loaders that solve this problem. You can define loader functions that run before route components render. This ensures data availability for both server and client rendering.
// routes.js
import { json } from '@remix-run/node'; export async function loader({ params }) { const product = await fetchProduct(params.id); if (!product) { throw new Response('Not Found', { status: 404 }); } return json(product);
} export default function ProductDetail() { const product = useLoaderData(); return ( <article> <h1>{product.name}</h1> <p>{product.description}</p> </article> );
}
The loader function runs on the server during SSR. It fetches required data before component rendering begins. The component receives this data through useLoaderData hook. Search engines see the complete rendered output.
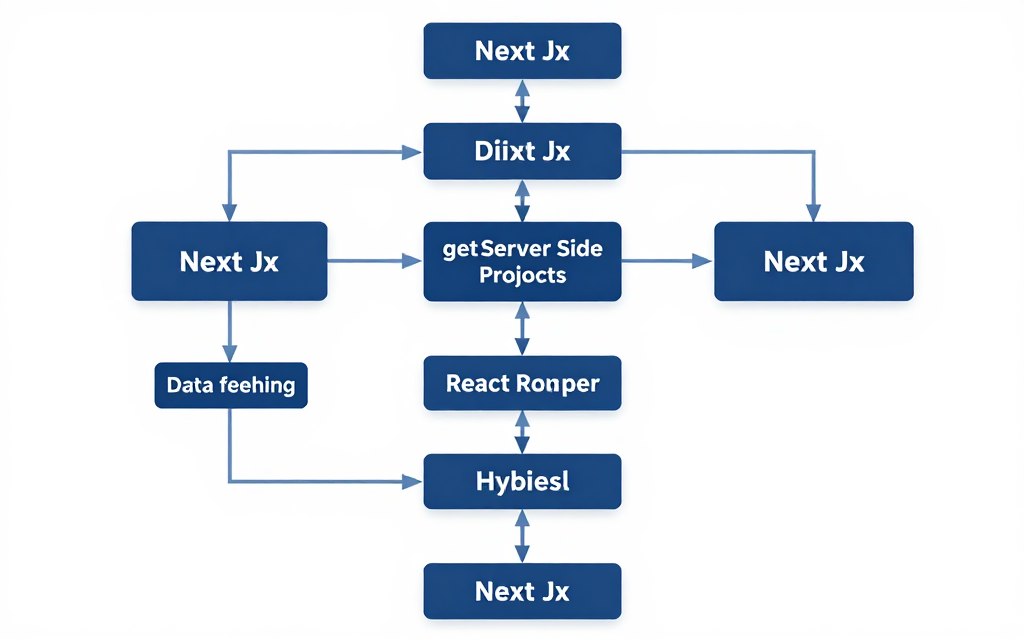
Implementing SSR with Next.js
Next.js provides built-in SSR support with file-based routing. However, you can integrate React Router v6 if needed. This combination offers flexibility for complex routing requirements alongside Next.js SSR capabilities.
Next.js handles most SSR complexity automatically. The getServerSideProps function fetches data on each request. The framework then renders your components with this data before sending HTML to the browser.
// pages/products/[id].js in Next.js
export async function getServerSideProps({ params }) { const product = await fetchProduct(params.id); return { props: { product } };
} export default function ProductPage({ product }) { return ( <article> <h1>{product.name}</h1> <p>{product.description}</p> </article> );
}
This approach ensures search engines receive fully rendered pages. Next.js also handles hydration automatically. The client-side JavaScript takes over after initial page load for subsequent navigation.
Using Remix for Enhanced SSR
Remix is built directly on React Router v6. It provides advanced SSR capabilities designed specifically for router integration. The framework handles data loading, mutations, and error boundaries seamlessly.
Remix uses the loader pattern extensively. Each route can define a loader function that runs on the server. The framework manages data fetching, caching, and revalidation automatically.
// app/routes/products.$id.jsx in Remix
import { json } from '@remix-run/node';
import { useLoaderData } from '@remix-run/react'; export async function loader({ params }) { const product = await fetchProduct(params.id); return json(product);
} export default function ProductDetail() { const product = useLoaderData(); return ( <article> <h1>{product.name}</h1> <p>{product.description}</p> <img src={product.image} alt={product.name} /> </article> );
}
Remix ensures optimal SEO out of the box. Search engines receive complete HTML with all data rendered. The framework also handles meta tags, status codes, and redirects properly.
Hydration and Progressive Enhancement
After server-side rendering delivers initial HTML, client-side JavaScript takes over. This process is called hydration. React attaches event listeners to existing DOM elements rather than re-rendering everything.
Proper hydration ensures interactive features work after page load. The client-side bundle must match the server-rendered output exactly. Mismatches cause hydration errors and potential functionality issues.
// client.js
import { hydrateRoot } from 'react-dom/client';
import { BrowserRouter } from 'react-router-dom';
import App from './App'; const root = document.getElementById('root'); hydrateRoot( root, <BrowserRouter> <App /> </BrowserRouter>
);
Progressive enhancement builds on this foundation. The page works without JavaScript using server-rendered HTML. Then JavaScript enhances the experience with interactive features. This approach provides the best experience for all users and search engines.
SSR Implementation Templates
Download our complete SSR setup templates for Express, Next.js, and Remix. Each template includes environment configuration, data loading patterns, and deployment guides.
Handling Authentication in SSR
Authentication adds complexity to server-side rendering. The server needs access to user session data to render personalized content. This requires careful handling of cookies and session tokens.
Protected routes must check authentication status on the server. If a user is not authenticated, the server should send appropriate responses. This might mean redirecting to a login page or showing public content only.
// Protected route with SSR
export async function loader({ request }) { const session = await getSession(request.headers.get('Cookie')); const user = session.get('user'); if (!user) { throw redirect('/login'); } const userData = await fetchUserData(user.id); return json(userData);
}
This pattern ensures proper access control during server rendering. Search engines see appropriate content based on authentication requirements. Private content stays protected while public content remains crawlable.
Optimizing SSR Performance
Server-side rendering adds computational overhead. Each request requires server resources to render React components. This can impact response times if not optimized properly.
Caching strategies help mitigate SSR performance costs. You can cache rendered HTML for public pages. Dynamic content might use shorter cache durations or cache individual components rather than full pages.
Consider implementing streaming SSR for complex pages. This technique sends HTML chunks as they render rather than waiting for complete page rendering. Users and search engines see content faster, improving perceived performance.
Best Practice: Start with static generation for content that changes infrequently. Use SSR only for pages requiring real-time data or personalization. This balanced approach optimizes both performance and SEO effectiveness.
Proper Use of the ScrollRestoration Component
The ScrollRestoration component maintains natural browser scrolling behavior in single-page applications. When users navigate between pages, browsers normally reset scroll position to the top. React Router v6 requires explicit implementation of this behavior.
Search engines consider user experience signals in rankings. Proper scroll management contributes to better user experience metrics. This indirectly impacts your SEO performance through improved engagement signals.
Understanding Scroll Position Challenges
Client-side routing does not trigger full page reloads. The browser maintains scroll position across route changes by default. Users navigating to a new route expect to see the top of the page, not the middle.
The problem becomes more complex with browser back and forward buttons. Users expect the browser to restore the previous scroll position when navigating backward. This behavior needs manual implementation in single-page apps.

Implementing ScrollRestoration in React Router v6
React Router v6 provides a ScrollRestoration component for handling scroll behavior. This component automatically scrolls to the top on navigation and restores positions when using browser history.
import { ScrollRestoration } from 'react-router-dom'; function App() { return ( <BrowserRouter> <Routes> <Route path="/" element={<Layout />}> <Route index element={<HomePage />} /> <Route path="products" element={<ProductsPage />} /> </Route> </Routes> <ScrollRestoration /> </BrowserRouter> );
}
Place the ScrollRestoration component inside your BrowserRouter but outside Routes. It monitors location changes and manages scroll positions automatically. This single addition fixes most scroll-related user experience issues.
Customizing Scroll Behavior
Different pages may require different scroll behavior. Long lists might benefit from maintaining scroll position during back navigation. Landing pages should always start at the top regardless of history.
The ScrollRestoration component accepts a getKey prop for custom behavior. This function determines how to store and restore scroll positions for specific routes.
<ScrollRestoration getKey={(location, matches) => { // Always scroll to top for new searches if (location.pathname === '/search') { return location.pathname + location.search; } // Maintain scroll for product listings if (location.pathname.startsWith('/products')) { return 'products'; } // Default behavior for other routes return location.key; }}
/>
This customization allows fine control over scroll behavior per route. Search result pages reset scroll position when query parameters change. Product listing pages maintain scroll position for better browsing experience.
Handling Hash Links and Anchor Navigation
Hash links allow navigation to specific page sections. The URL includes a hash identifier that matches an element ID. Browsers automatically scroll to these anchors on page load.
React Router handles hash navigation, but timing matters. The target element must exist in the DOM before scrolling occurs. Components rendering asynchronously can cause hash navigation to fail.
import { useEffect } from 'react';
import { useLocation } from 'react-router-dom'; function ScrollToHash() { const { hash } = useLocation(); useEffect(() => { if (hash) { // Small delay ensures element is rendered setTimeout(() => { const element = document.querySelector(hash); if (element) { element.scrollIntoView({ behavior: 'smooth' }); } }, 100); } }, [hash]); return null;
}
This component handles hash navigation after component rendering completes. The setTimeout ensures target elements exist before attempting to scroll. Smooth scrolling provides better user experience than instant jumps.
Managing Scroll Position in Modal Routes
Modal dialogs present unique scroll challenges. The underlying page should maintain scroll position when modals open. Some implementations use route changes to display modals, complicating scroll management.
Modal routes need special handling to prevent unwanted scroll behavior. The background page should not scroll to top when the modal opens. Similarly, closing the modal should restore the previous position.
function ModalRoute() { const location = useLocation(); const state = location.state; useEffect(() => { // Prevent body scroll when modal is open if (state?.backgroundLocation) { document.body.style.overflow = 'hidden'; return () => { document.body.style.overflow = 'unset'; }; } }, [state]); return ( <Routes location={state?.backgroundLocation || location}> {/* Routes here */} </Routes> );
}
This implementation prevents background scrolling when modals open. The location state tracks whether a route should render as a modal. Body overflow control ensures the underlying page remains fixed.
SEO Impact: While scroll behavior does not directly affect crawling, it significantly impacts user experience metrics. Bounce rates and time on page influence search rankings. Proper scroll management keeps users engaged longer.
Testing Scroll Behavior Across Browsers
Different browsers implement scroll restoration differently. Some browsers have native scroll restoration that conflicts with React Router. Testing across browsers ensures consistent behavior for all users.
Chrome and Firefox support manual scroll restoration control. Safari historically had limitations with programmatic scrolling. Mobile browsers add another layer of complexity with pull-to-refresh gestures.
Disable native browser scroll restoration to prevent conflicts. Set history.scrollRestoration to ‘manual’ in your app initialization. This gives React Router complete control over scroll behavior.
// Disable native scroll restoration
if ('scrollRestoration' in window.history) { window.history.scrollRestoration = 'manual';
}
Add this code before rendering your React app. It prevents browser-native scroll restoration from conflicting with your custom implementation. This ensures consistent behavior across all modern browsers.
Handling 404 Pages and Redirects with the v6 API
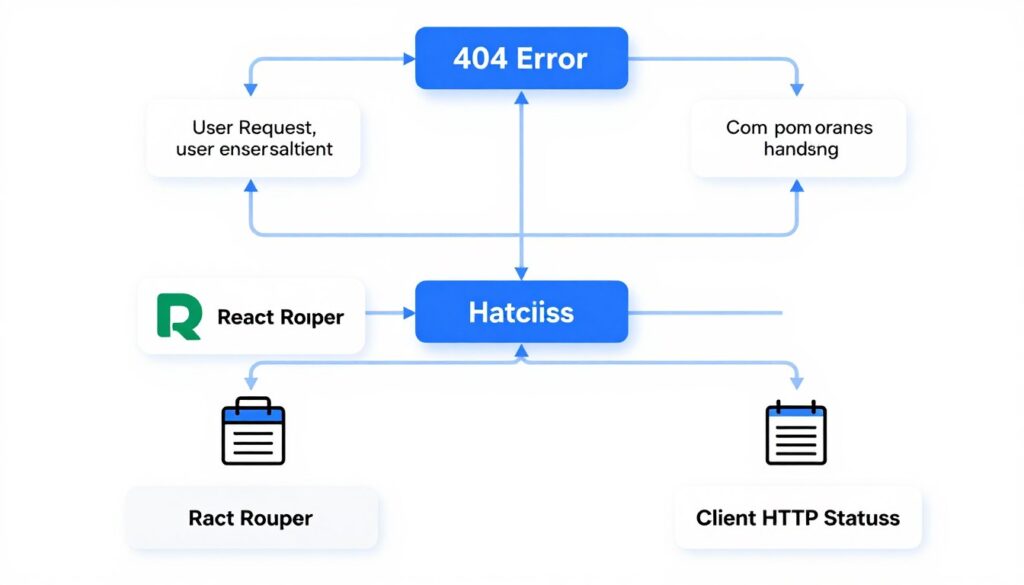
Proper error handling maintains SEO value and improves user experience. Search engines need to receive correct HTTP status codes. Users encountering broken links should see helpful content instead of blank pages.
React Router v6 provides specific mechanisms for handling not-found routes and redirects. These features must be implemented carefully to work correctly with both client-side navigation and server-side rendering.
Implementing Catch-All 404 Routes
A catch-all route matches any path not handled by specific routes. This route should render a helpful 404 error page. Place this route last in your route configuration so it only matches after all other routes fail.
import { Routes, Route } from 'react-router-dom'; function App() { return ( <Routes> <Route path="/" element={<HomePage />} /> <Route path="/products" element={<ProductsPage />} /> <Route path="/products/:id" element={<ProductDetail />} /> <Route path="*" element={<NotFound />} /> </Routes> );
} function NotFound() { return ( <div> <h1>404 - Page Not Found</h1> <p>The page you are looking for does not exist.</p> <Link to="/">Return to Home</Link> </div> );
}
This pattern catches all unmatched routes. The asterisk path acts as a wildcard matching any route. Users see a helpful error page instead of a blank screen or JavaScript error.
Setting Proper HTTP Status Codes
Client-side routing alone cannot set HTTP status codes. The server always returns 200 OK for all routes by default. Search engines need to see 404 status codes for non-existent pages to properly update their index.
Server-side rendering allows proper status code management. The server detects unmatched routes and sends appropriate status codes. This ensures search engines correctly identify and handle missing pages.
// server.js with SSR
app.get('*', (req, res) => { let statusCode = 200; const html = renderToString( <StaticRouter location={req.url}> <Routes> <Route path="/" element={<HomePage />} /> <Route path="/products" element={<ProductsPage />} /> <Route path="*" element={ <NotFound onRender={() => { statusCode = 404; }} /> } /> </Routes> </StaticRouter> ); res.status(statusCode).send(html);
});
The NotFound component signals the server to use 404 status code. The server then sends this code in the HTTP response. Search engines receive the correct signal that the page does not exist.
Implementing Redirects with Navigate Component
The Navigate component handles programmatic redirects in React Router v6. This replaces the old Redirect component from previous versions. Navigate renders a redirect when the component mounts.
import { Navigate } from 'react-router-dom'; function OldProductPage() { return <Navigate to="/products/new-location" replace />;
} function App() { return ( <Routes> <Route path="/products/old-location" element={<OldProductPage />} /> <Route path="/products/new-location" element={<ProductDetail />} /> </Routes> );
}
The replace prop removes the redirect route from history. Users cannot navigate back to the redirected URL. This creates cleaner navigation history and better user experience.
Server-Side Redirect Implementation
Client-side redirects do not help search engines. The server must send proper redirect status codes. Use 301 for permanent redirects and 302 for temporary ones. Search engines handle these codes appropriately.
Server-side rendering frameworks provide redirect utilities. These utilities let you trigger redirects during server rendering. The server then sends correct status codes and Location headers.
// In a Remix loader
import { redirect } from '@remix-run/node'; export async function loader({ params }) { const product = await fetchProduct(params.oldId); if (product.newId) { // Permanent redirect to new URL return redirect(`/products/${product.newId}`, 301); } return json(product);
}
This loader redirects old product IDs to new ones. The 301 status code tells search engines the move is permanent. They update their index to point to the new URL instead of the old one.
Handling Dynamic 404s for Missing Resources
Routes may match but resources might not exist. A product detail route matches any ID, but specific products may be deleted. These scenarios need dynamic 404 handling based on data availability.
function ProductDetail() { const { id } = useParams(); const [product, setProduct] = useState(null); const [loading, setLoading] = useState(true); const [notFound, setNotFound] = useState(false); useEffect(() => { fetchProduct(id) .then(setProduct) .catch(() => setNotFound(true)) .finally(() => setLoading(false)); }, [id]); if (loading) return <Loading />; if (notFound) return <NotFound />; return <article>{product.name}</article>;
}
This pattern checks resource existence after route matching. Missing resources trigger the NotFound component. Search engines need server-side implementation to receive proper 404 status codes.
Complete Error Handling Kit
Get our comprehensive error handling implementation guide including 404 pages, redirect patterns, and status code management for both client and server rendering.
Creating Helpful 404 Pages
A good 404 page helps users find what they need. Include search functionality, popular page links, and clear messaging. This reduces bounce rates and keeps users on your site longer.
Essential 404 Page Elements
- Clear explanation that the page does not exist
- Search box to find desired content
- Links to popular or related pages
- Site navigation to explore other areas
- Contact information if users need help
SEO Benefits
- Reduces bounce rate from broken links
- Provides alternative navigation paths
- Maintains positive user experience
- Signals proper site maintenance to search engines
- Helps users find similar content they seek
Monitoring and Fixing Broken Links
Regular monitoring identifies broken links before they harm SEO. Use Google Search Console to find pages returning 404 errors. Analytics tools show which missing pages users attempt to access most frequently.
Implement redirects for previously existing pages. This preserves any SEO value those pages accumulated. Monitor for common URL typos and create redirects for these as well.
Set up logging for 404 errors in production. Track which paths trigger 404 responses most often. This data helps identify patterns and opportunities for redirects or content creation.
Pro Tip: Use wildcard redirects sparingly. Redirecting entire sections to a single page can harm user experience and SEO. Create specific redirects for important pages instead.
Implementing Meta Tags and Structured Data for Dynamic Routes
Meta tags and structured data help search engines understand your content. Each page needs unique meta information describing its specific content. Dynamic routing complicates this because pages share common component code.
Search engines use meta tags for search result snippets. The title tag and meta description appear in search listings. Proper implementation directly impacts click-through rates from search results.
Managing Document Head with React Helmet
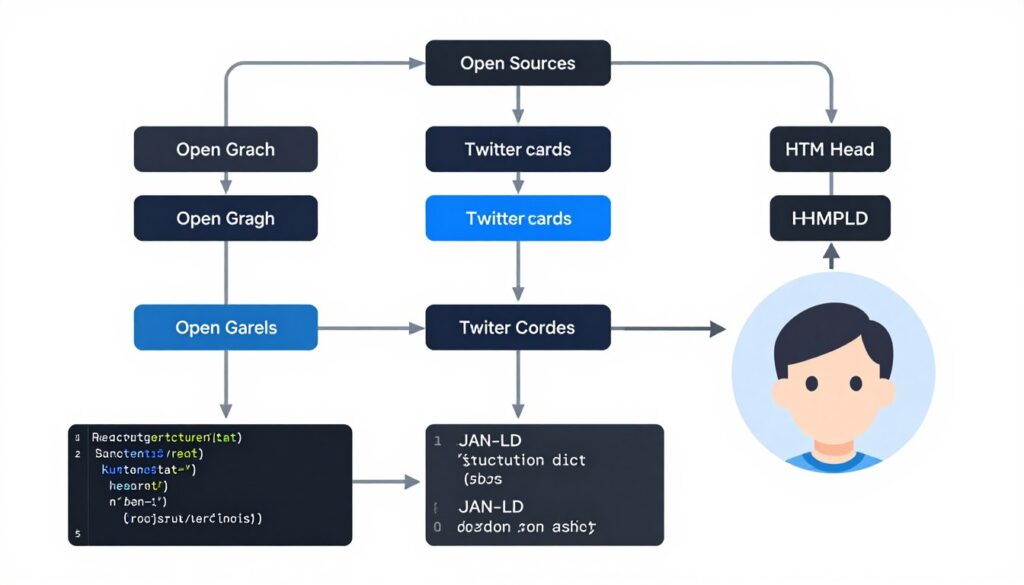
React Helmet provides a way to manage document head changes. This library works with React Router to update meta tags based on current route. Components can declare their own meta tags that override parent components.
import { Helmet } from 'react-helmet-async'; function ProductDetail({ product }) { return ( <> <Helmet> <title>{product.name} - Buy Online</title> <meta name="description" content={product.description} /> <meta property="og:title" content={product.name} /> <meta property="og:description" content={product.description} /> <meta property="og:image" content={product.imageUrl} /> <link rel="canonical" href={`https://example.com/products/${product.id}`} /> </Helmet> <article> <h1>{product.name}</h1> <p>{product.description}</p> </article> </> );
}
Each component declares meta tags relevant to its content. Helmet updates the document head when components render. This works perfectly for user navigation but requires server-side rendering for search engines.
Server-Side Meta Tag Rendering
Search engines need meta tags in the initial HTML response. React Helmet supports server-side rendering through the HelmetProvider component. The provider collects all Helmet tags during server rendering.
// server.js
import { HelmetProvider } from 'react-helmet-async';
import { renderToString } from 'react-dom/server'; app.get('*', (req, res) => { const helmetContext = {}; const html = renderToString( <HelmetProvider context={helmetContext}> <StaticRouter location={req.url}> <App /> </StaticRouter> </HelmetProvider> ); const { helmet } = helmetContext; res.send(` <!DOCTYPE html> <html ${helmet.htmlAttributes.toString()}> <head> ${helmet.title.toString()} ${helmet.meta.toString()} ${helmet.link.toString()} </head> <body> <div id="root">${html}</div> </body> </html> `);
});
The helmet context captures all meta tags during rendering. The server then injects these tags into the HTML template. Search engines receive complete meta information with the initial response.
Dynamic Meta Tags Based on Route Data
Route parameters determine which content to display. Meta tags must reflect this dynamic content accurately. Load data first, then generate meta tags based on actual content.
function BlogPost() { const { slug } = useParams(); const post = useLoaderData(); return ( <> <Helmet> <title>{post.title} | Our Blog</title> <meta name="description" content={post.excerpt} /> <meta name="author" content={post.author} /> <meta property="article:published_time" content={post.publishedDate} /> <meta property="article:modified_time" content={post.updatedDate} /> <meta property="og:type" content="article" /> <link rel="canonical" href={`https://example.com/blog/${slug}`} /> </Helmet> <article> <h1>{post.title}</h1> <div dangerouslySetInnerHTML={{ __html: post.content }} /> </article> </> );
}
The component receives post data from the loader. Meta tags use actual post information for accurate descriptions. This ensures search engines index correct information for each page.
Implementing Structured Data with JSON-LD
Structured data helps search engines understand content context. JSON-LD format embeds structured data in script tags. Search engines parse this data to create rich search results.
function ProductDetail({ product }) { const structuredData = { "@context": "https://schema.org", "@type": "Product", "name": product.name, "description": product.description, "image": product.imageUrl, "offers": { "@type": "Offer", "price": product.price, "priceCurrency": "USD", "availability": "https://schema.org/InStock" } }; return ( <> <Helmet> <script type="application/ld+json"> {JSON.stringify(structuredData)} </script> </Helmet> <article> {/* Product content */} </article> </> );
}
This structured data enables rich product results in search. Google may show price, availability, and ratings directly in search listings. This increases click-through rates and visibility.
Common Structured Data Types for Different Routes
Different content types benefit from specific structured data schemas. Articles use NewsArticle or BlogPosting schema. Products use Product schema. Events need Event schema. Match schema types to your content for best results.
Article/Blog Posts
- headline, author, datePublished
- image, publisher information
- articleBody or articleSection
- wordCount and keywords
Products
- name, description, image
- offers with price and availability
- aggregateRating and reviews
- brand and SKU information
Handling Canonical URLs
Canonical tags prevent duplicate content issues. Multiple URLs might display the same content. The canonical tag tells search engines which URL is the primary version.
Dynamic routes often create URL variations. Query parameters, trailing slashes, or different parameter orders create duplicate URLs. Always specify the canonical URL to consolidate SEO value.
function ProductDetail() { const { id } = useParams(); const location = useLocation(); // Remove query parameters for canonical URL const canonicalUrl = `https://example.com/products/${id}`; return ( <Helmet> <link rel="canonical" href={canonicalUrl} /> </Helmet> );
}
This ensures all product variations point to a single canonical URL. Search engines consolidate ranking signals to the canonical version. This strengthens SEO performance for the primary URL.
Managing Open Graph and Twitter Cards
Social media platforms use Open Graph and Twitter Card meta tags. These tags control how links appear when shared on social networks. Proper implementation increases social engagement and traffic.
<Helmet> {/* Open Graph tags */} <meta property="og:type" content="article" /> <meta property="og:title" content={post.title} /> <meta property="og:description" content={post.excerpt} /> <meta property="og:image" content={post.imageUrl} /> <meta property="og:url" content={window.location.href} /> {/* Twitter Card tags */} <meta name="twitter:card" content="summary_large_image" /> <meta name="twitter:title" content={post.title} /> <meta name="twitter:description" content={post.excerpt} /> <meta name="twitter:image" content={post.imageUrl} />
</Helmet>
Include both Open Graph and Twitter tags for maximum compatibility. Facebook and LinkedIn use Open Graph. Twitter uses its own tags but falls back to Open Graph when Twitter tags are missing.
Meta Tag and Structured Data Generator
Access our interactive tool to generate proper meta tags and JSON-LD structured data for your React Router routes. Includes validation and testing features.
Testing Meta Tags and Structured Data
Test your implementation before deploying to production. Several tools validate meta tags and structured data. Google Search Console provides a Rich Results Test tool. The Facebook Sharing Debugger checks Open Graph implementation.
View page source to verify meta tags appear in server-rendered HTML. Client-side tag injection does not help search engines. Tags must be present in the initial HTML response.
Monitor Search Console for structured data errors. Google reports parsing issues and missing required fields. Fix these errors to maintain rich search result eligibility.
Using the useLocation Hook for SEO-Friendly URL Tracking
The useLocation hook provides access to the current URL location. This includes pathname, search parameters, hash, and state information. Proper URL management affects both user experience and search engine optimization.
URLs communicate page content to users and search engines. Clean, descriptive URLs improve click-through rates from search results. The useLocation hook helps you work with URLs effectively in your React Router application.
Understanding the Location Object
The location object contains several properties describing the current URL. The pathname shows the route path. Search contains query parameters. Hash holds anchor identifiers. State carries location-specific data passed during navigation.
import { useLocation } from 'react-router-dom'; function CurrentLocation() { const location = useLocation(); console.log(location.pathname); // "/products/123" console.log(location.search); // "?color=blue&size=large" console.log(location.hash); // "#reviews" console.log(location.state); // Custom state object return null;
}
Access these properties to make routing decisions. The pathname identifies which component to render. Search parameters customize component behavior. Hash enables anchor navigation. State transfers data between routes.
Implementing SEO-Friendly URL Structures
URL structure impacts search engine rankings. Use clear, descriptive paths that reflect content hierarchy. Avoid unnecessary parameters and session identifiers in URLs. Keep URLs readable and meaningful to humans.
Good URL Patterns
- /products/running-shoes
- /blog/react-router-seo-guide
- /category/electronics/smartphones
- /docs/getting-started
Avoid These Patterns
- /page?id=123&session=abc
- /p/a1b2c3d4e5
- /index.php?page=products
- /products#details (for main content)
Working with Query Parameters
Query parameters add flexibility to URLs. They filter, sort, or customize page content. However, excessive query parameters create multiple URL variations pointing to similar content.
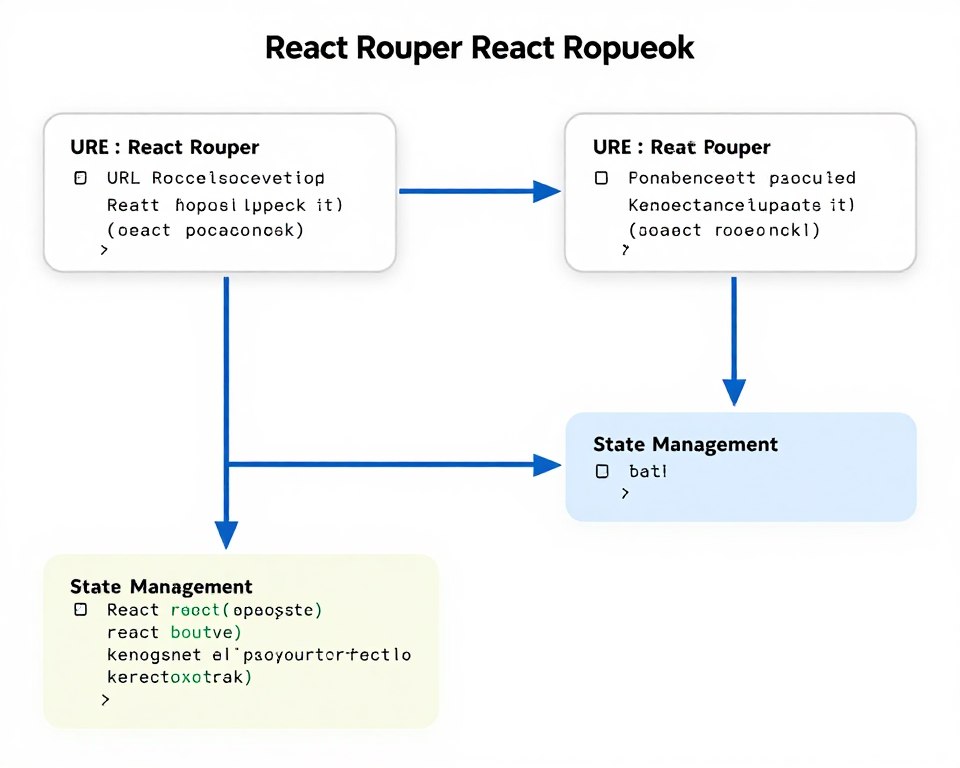
The useSearchParams hook simplifies query parameter management. This hook provides an interface similar to URLSearchParams. It updates the URL when parameters change while maintaining other location properties.
import { useSearchParams } from 'react-router-dom'; function ProductFilters() { const [searchParams, setSearchParams] = useSearchParams(); const color = searchParams.get('color'); const size = searchParams.get('size'); const handleFilterChange = (key, value) => { const newParams = new URLSearchParams(searchParams); if (value) { newParams.set(key, value); } else { newParams.delete(key); } setSearchParams(newParams); }; return ( <div> <select onChange={(e) => handleFilterChange('color', e.target.value)}> <option value="">All Colors</option> <option value="red">Red</option> <option value="blue">Blue</option> </select> </div> );
}
This pattern keeps URLs clean and manageable. Users can bookmark filtered views. Search engines can index different filter combinations. However, consider using canonical tags to prevent duplicate content issues.
Tracking Page Views for Analytics
Analytics tools need accurate page view tracking in single-page applications. Traditional analytics rely on full page loads. Client-side routing requires manual tracking of route changes.
The useLocation hook enables analytics tracking. Monitor location changes and send page view events. This ensures accurate analytics data for your React Router application.
import { useEffect } from 'react';
import { useLocation } from 'react-router-dom'; function AnalyticsTracker() { const location = useLocation(); useEffect(() => { // Send page view to Google Analytics if (typeof window.gtag !== 'undefined') { window.gtag('config', 'GA_MEASUREMENT_ID', { page_path: location.pathname + location.search, }); } // Track with custom analytics window.analytics?.page({ path: location.pathname, search: location.search, title: document.title, }); }, [location]); return null;
} // Add to your app
function App() { return ( <BrowserRouter> <AnalyticsTracker /> <Routes> {/* Your routes */} </Routes> </BrowserRouter> );
}
This component tracks every route change. The effect runs whenever location updates. Analytics tools receive page view events for accurate traffic reporting.
Managing URL State Without Query Parameters
Location state provides an alternative to query parameters. This state travels with navigation but does not appear in the URL. Use state for temporary UI information that should not persist in URLs.
import { useNavigate, useLocation } from 'react-router-dom'; function ProductList() { const navigate = useNavigate(); const handleProductClick = (productId) => { navigate(`/products/${productId}`, { state: { from: 'product-list', scrollPosition: window.scrollY } }); }; return ( <div> {/* Product list */} </div> );
} function ProductDetail() { const location = useLocation(); const { from, scrollPosition } = location.state || {}; // Use state to customize behavior if (from === 'product-list') { // Show back button, restore scroll position, etc. } return <article>{/* Product details */}</article>;
}
Location state keeps URLs clean while passing navigation context. Back buttons can restore previous scroll positions. The state persists across browser history but does not clutter URLs.
Implementing Breadcrumb Navigation
Breadcrumbs improve user navigation and SEO. They show page hierarchy and provide quick navigation to parent pages. Search engines use breadcrumbs to understand site structure.
The useLocation hook helps build dynamic breadcrumbs. Parse the pathname to identify the navigation hierarchy. Generate breadcrumb links based on the current location.
function Breadcrumbs() { const location = useLocation(); const pathnames = location.pathname.split('/').filter(x => x); return ( <nav> <Link to="/">Home</Link> {pathnames.map((name, index) => { const routeTo = `/${pathnames.slice(0, index + 1).join('/')}`; const isLast = index === pathnames.length - 1; return ( <span key={routeTo}> {' / '} {isLast ? ( <span>{name}</span> ) : ( <Link to={routeTo}>{name}</Link> )} </span> ); })} </nav> );
}
This component generates breadcrumbs automatically from the current path. Users can navigate up the hierarchy easily. Include structured data markup to enhance search result display.
Handling URL Changes for SEO
Monitor URL changes to update page content appropriately. Components should react to parameter changes and fetch new data. This ensures content matches the current URL state.
function BlogPost() { const { slug } = useParams(); const location = useLocation(); const [post, setPost] = useState(null); useEffect(() => { // Fetch new post when slug changes fetchPost(slug).then(setPost); }, [slug]); useEffect(() => { // Update document title when content loads if (post) { document.title = `${post.title} | Blog`; } }, [post]); if (!post) return <Loading />; return <article>{/* Post content */}</article>;
}
This pattern ensures content updates match URL changes. The document title updates when new content loads. Search engines and users see consistent information reflecting the current URL.
Best Practice: Always ensure your URL accurately represents the current page content. Mismatches between URLs and content confuse users and search engines, harming both experience and rankings.
Lazy Loading Routes While Maintaining SEO Integrity
Code splitting reduces initial bundle sizes. Lazy loading loads route components only when needed. This improves performance metrics that affect SEO rankings. However, implementation requires care to maintain search engine visibility.
React provides lazy and Suspense for component lazy loading. React Router v6 works seamlessly with these features. The challenge lies in ensuring search engines can still access content despite asynchronous loading.
Implementing Basic Route Lazy Loading
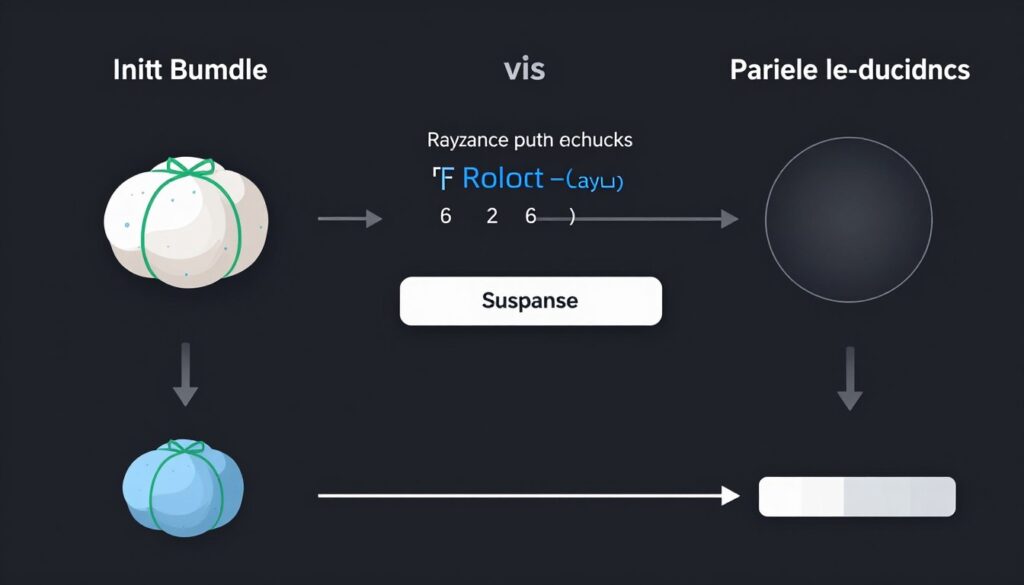
The React.lazy function enables dynamic imports. Wrap lazy imports in Suspense components to handle loading states. React Router automatically waits for lazy components to load before rendering.
import { lazy, Suspense } from 'react';
import { Routes, Route } from 'react-router-dom'; const HomePage = lazy(() => import('./pages/HomePage'));
const ProductsPage = lazy(() => import('./pages/ProductsPage'));
const ProductDetail = lazy(() => import('./pages/ProductDetail')); function App() { return ( <Suspense fallback={<LoadingSpinner />}> <Routes> <Route path="/" element={<HomePage />} /> <Route path="/products" element={<ProductsPage />} /> <Route path="/products/:id" element={<ProductDetail />} /> </Routes> </Suspense> );
}
This code splits each page into separate bundles. The browser loads only the necessary code for the current route. Users experience faster initial page loads because smaller bundles download faster.
Understanding SEO Implications
Lazy loading creates timing challenges for search engines. Crawlers need to wait for async components to load. Modern search engines handle this better than older ones, but timing still matters.
The Suspense fallback appears while components load. Search engines might see this fallback instead of actual content. Server-side rendering becomes even more important with lazy-loaded routes.
Google generally handles lazy loading well when content loads quickly. Other search engines have varying support for JavaScript execution. Server-side rendering ensures all search engines receive complete content immediately.
Server-Side Rendering with Lazy Routes
SSR requires all lazy components to load before rendering. The server cannot use React.lazy directly because it relies on browser-specific APIs. Use a different approach for server builds.
// routes.js - Shared route configuration
export const routes = [ { path: '/', component: () => import('./pages/HomePage'), }, { path: '/products', component: () => import('./pages/ProductsPage'), },
]; // client.js - Client-side with lazy loading
const HomePage = lazy(() => import('./pages/HomePage'));
const ProductsPage = lazy(() => import('./pages/ProductsPage')); // server.js - Server-side with direct imports
import HomePage from './pages/HomePage';
import ProductsPage from './pages/ProductsPage';
This approach uses lazy loading on the client but direct imports on the server. The server renders complete HTML immediately. The client benefits from code splitting and lazy loading.
Optimizing Loading Performance
Loading speed affects both user experience and SEO. Slow-loading components hurt Core Web Vitals scores. Optimize lazy-loaded components to load as quickly as possible.
Performance Optimization Techniques
- Preload critical routes users likely visit next
- Use route-based code splitting strategically
- Minimize lazy-loaded bundle sizes
- Implement loading states that prevent layout shifts
SEO Benefits
- Faster initial page load improves rankings
- Better Core Web Vitals scores
- Reduced time to interactive
- Lower bounce rates from faster loading
Preloading Routes for Better UX
Preload likely next routes before users navigate. This reduces perceived loading time. The browser downloads code in the background while users read current content.
import { useEffect } from 'react';
import { useLocation } from 'react-router-dom'; function RoutePreloader() { const location = useLocation(); useEffect(() => { // Preload product pages when on homepage if (location.pathname === '/') { const link = document.createElement('link'); link.rel = 'prefetch'; link.href = '/products-chunk.js'; document.head.appendChild(link); } }, [location]); return null;
}
This component preloads route bundles based on current location. Users clicking to the products page see instant loading. The code already exists in browser cache.
Handling Loading States Properly
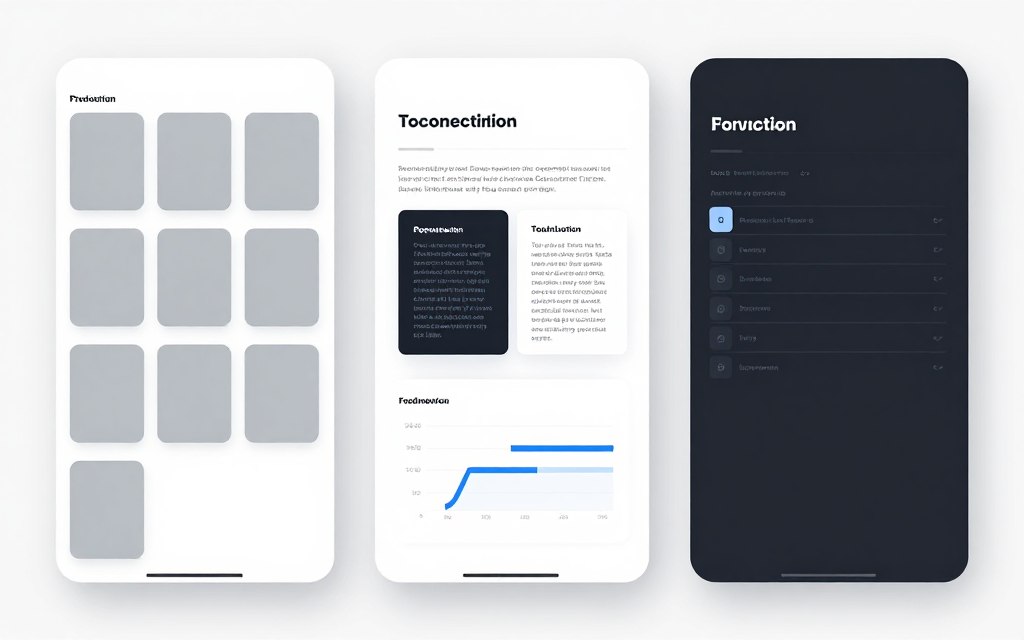
Loading fallbacks should not cause layout shifts. Layout shifts harm user experience and SEO scores. Design loading states that match final content dimensions.
function LoadingFallback() { return ( <div style={{ minHeight: '500px' }}> <div className="skeleton-header" /> <div className="skeleton-content" /> </div> );
} function App() { return ( <Suspense fallback={<LoadingFallback />}> <Routes> {/* Routes */} </Routes> </Suspense> );
}
Skeleton screens preview content layout. This prevents visual jumping when content loads. Users see smooth transitions from loading to loaded states.
Lazy Loading Nested Routes
Nested routes can be lazy-loaded independently. This provides granular control over code splitting. Parent layouts load separately from child route content.
const Layout = lazy(() => import('./components/Layout'));
const ProductsList = lazy(() => import('./pages/ProductsList'));
const ProductDetail = lazy(() => import('./pages/ProductDetail')); function App() { return ( <Routes> <Route path="/" element={ <Suspense fallback={<LayoutLoader />}> <Layout /> </Suspense> }> <Route path="products" element={ <Suspense fallback={<ContentLoader />}> <ProductsList /> </Suspense> } /> <Route path="products/:id" element={ <Suspense fallback={<ContentLoader />}> <ProductDetail /> </Suspense> } /> </Route> </Routes> );
}
Each Suspense boundary handles its own loading state. Layout components can load while child content is still loading. This provides more responsive user experience.
Performance Optimization Checklist
Get our comprehensive checklist for optimizing lazy-loaded routes. Includes bundle analysis tools, performance testing procedures, and Core Web Vitals optimization strategies.
Monitoring Bundle Sizes
Regular bundle analysis identifies optimization opportunities. Tools like webpack-bundle-analyzer visualize chunk sizes. Monitor bundle growth over time to prevent performance regression.
Set performance budgets for route bundles. Alert when bundles exceed size limits. This prevents gradual performance degradation as applications grow.
Consider the total code users download across multiple routes. Initial route plus commonly visited routes form the effective bundle size. Optimize these routes most aggressively.
Testing Lazy Loading with Search Engines
Test your lazy-loaded routes with Google Search Console. The URL Inspection tool shows how Googlebot renders pages. Verify that all content appears in the rendered view.
Use Lighthouse to measure performance impact. Lazy loading should improve performance scores. Poor implementation might worsen metrics despite code splitting benefits.
Monitor Core Web Vitals in Google Search Console. Track Largest Contentful Paint, First Input Delay, and Cumulative Layout Shift. These metrics directly influence search rankings.
Best Practices for Nested Routes and Layout Components
Nested routes create hierarchical URL structures. Layout components wrap child routes with common elements like headers and sidebars. This architecture improves code organization while maintaining SEO effectiveness.
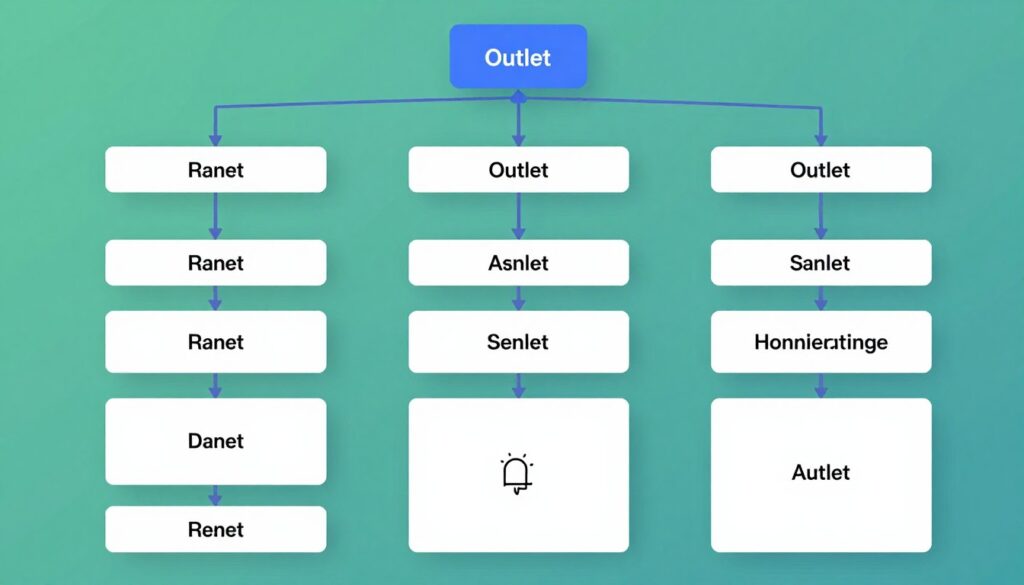
React Router v6 significantly improved nested routing. The Outlet component renders child routes within parent layouts. This creates flexible page structures without sacrificing search engine compatibility.
Designing Nested Route Hierarchies
Route hierarchy should mirror your content structure. Top-level routes represent main sections. Nested routes show relationships between content pieces. This creates logical URL patterns that users and search engines understand.
import { Outlet } from 'react-router-dom'; function App() { return ( <Routes> <Route path="/" element={<RootLayout />}> <Route index element={<HomePage />} /> <Route path="blog" element={<BlogLayout />}> <Route index element={<BlogList />} /> <Route path=":slug" element={<BlogPost />} /> <Route path="category/:name" element={<CategoryPosts />} /> </Route> <Route path="products" element={<ProductsLayout />}> <Route index element={<ProductsList />} /> <Route path=":id" element={<ProductDetail />} /> </Route> </Route> </Routes> );
}
This structure creates clear URL patterns. Blog posts appear under /blog/. Products exist at /products/. The hierarchy reflects your site organization naturally.
Implementing Layout Components
Layout components provide consistent structure across related pages. They render shared elements like navigation, headers, and footers. The Outlet component shows where child routes render.
function RootLayout() { return ( <div> <Header /> <nav> <Link to="/">Home</Link> <Link to="/blog">Blog</Link> <Link to="/products">Products</Link> </nav> <main> <Outlet /> {/* Child routes render here */} </main> <Footer /> </div> );
} function BlogLayout() { return ( <div className="blog-layout"> <aside> <BlogSidebar /> </aside> <div className="blog-content"> <Outlet /> {/* Blog-specific child routes */} </div> </div> );
}
Each layout wraps its child routes. The RootLayout applies to all pages. BlogLayout adds blog-specific elements like sidebars. This creates consistent user experience across sections.
SEO Considerations for Layout Components
Layout components must not interfere with SEO. Search engines need to see page content immediately. Heavy JavaScript in layouts can delay content rendering.
Keep layout components lightweight. Move complex logic to child components. This ensures quick initial rendering for both users and crawlers.
Navigation links in layouts benefit SEO. They create internal linking structure. Search engines discover and crawl related pages through these links.
Layout Component Best Practices
- Render static HTML structure immediately
- Load dynamic data in child components
- Include navigation with proper internal links
- Use semantic HTML elements
Common Pitfalls to Avoid
- Heavy data fetching in layout components
- Blocking rendering on external resources
- Missing navigation links between sections
- Non-semantic div soup structure
Index Routes and Default Children
Index routes render when parent path matches exactly. They act as default child routes. This pattern works well for list-detail structures.
<Route path="products" element={<ProductsLayout />}> <Route index element={<ProductsList />} /> <Route path=":id" element={<ProductDetail />} />
</Route>
Visiting /products shows the product list. The path /products/123 shows product details. Both render within the ProductsLayout. This creates intuitive URL structure.
Sharing Data Between Parent and Child Routes
Parent routes sometimes need to share data with children. Context provides a clean solution. Layout components provide context that child routes consume.
const BlogContext = createContext(); function BlogLayout() { const [categories, setCategories] = useState([]); useEffect(() => { fetchCategories().then(setCategories); }, []); return ( <BlogContext.Provider value={{ categories }}> <div className="blog-layout"> <aside> <CategoryList categories={categories} /> </aside> <Outlet /> </div> </BlogContext.Provider> );
} function BlogPost() { const { categories } = useContext(BlogContext); return ( <article> {/* Use categories data */} </article> );
}
The layout fetches categories once. All child routes access this data through context. This reduces duplicate API calls and improves performance.
Pathless Routes for Component Composition
Pathless routes group routes without adding URL segments. They share layout logic or data loading without creating nested URLs.
<Route element={<AuthLayout />}> <Route path="/login" element={<Login />} /> <Route path="/register" element={<Register />} /> <Route path="/forgot-password" element={<ForgotPassword />} />
</Route>
The AuthLayout wraps all authentication pages. URLs remain clean without extra nesting. All three pages share the layout and authentication-related logic.
Handling Authentication in Nested Routes
Protected routes require authentication checks. Layout components can handle authentication at appropriate hierarchy levels. This protects entire sections with single implementation.
function ProtectedLayout() { const { user, loading } = useAuth(); if (loading) { return <Loading />; } if (!user) { return <Navigate to="/login" replace />; } return ( <div> <UserNav user={user} /> <Outlet /> </div> );
} <Route element={<ProtectedLayout />}> <Route path="/dashboard" element={<Dashboard />} /> <Route path="/profile" element={<Profile />} /> <Route path="/settings" element={<Settings />} />
</Route>
All routes under ProtectedLayout require authentication. Unauthenticated users redirect to login. This pattern centralizes access control logic.
Advanced Routing Patterns Library
Access our collection of production-ready routing patterns including authentication flows, multi-step forms, modal routes, and complex nested hierarchies with full SEO optimization.
Optimizing Nested Routes for Performance
Deep nesting can impact performance. Each layout level adds rendering overhead. Balance hierarchy depth against code organization benefits.
Consider flattening routes when hierarchy does not add value. Three or four nesting levels typically represent maximum practical depth. Beyond this, complexity outweighs benefits.
Lazy load nested routes to reduce initial bundle size. The parent layout can load immediately while child routes load on demand. This improves initial page load performance.
Common Pitfalls to Avoid
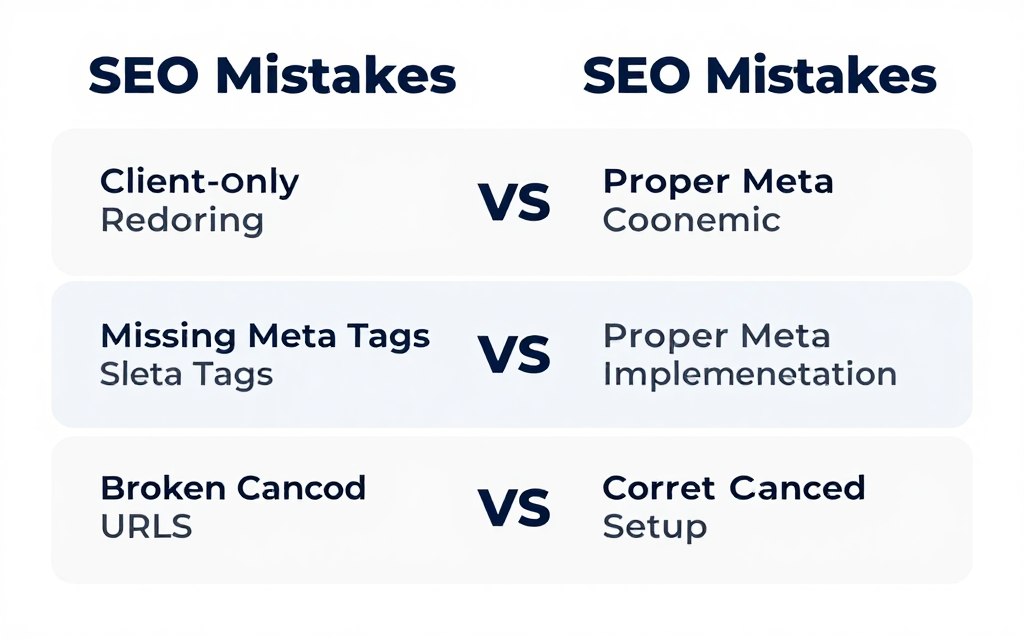
Even experienced developers make mistakes when implementing React Router with SEO. Understanding common pitfalls helps you avoid problems before they impact your search rankings. Prevention costs less than fixing issues after launch.
Relying Solely on Client-Side Rendering
The most critical mistake is deploying without server-side rendering. Pure client-side apps struggle with SEO. Search engines must wait for JavaScript execution to see content.
Google handles JavaScript better than other search engines. Bing and DuckDuckGo have more limited JavaScript support. International search engines vary widely in capabilities.
Implement SSR or static generation for public-facing content. Use client-side rendering only for authenticated sections. This balanced approach serves both users and search engines effectively.
Ignoring Meta Tag Management
Generic meta tags hurt SEO performance. Each page needs unique titles and descriptions. Single-page apps often ship with only the shell HTML meta tags.
Implement dynamic meta tag updates using React Helmet. Ensure server-side rendering includes proper meta tags. Test that search engines see correct information for each route.
Missing Open Graph tags reduce social media engagement. Links shared on social platforms look unprofessional without proper preview images and descriptions. Add Open Graph tags to all shareable content.
Poor URL Structure Decisions
URL structure affects both user experience and SEO. Common mistakes include overly complex parameters, meaningless ID-based URLs, and inconsistent patterns.
Good URL Practices
- Use descriptive, human-readable paths
- Keep URL hierarchy shallow and logical
- Include relevant keywords naturally
- Maintain consistent URL patterns across site
- Use hyphens to separate words in URLs
URL Mistakes to Avoid
- Using session IDs or tracking parameters
- Creating duplicate content through parameter variations
- Building URLs with only numeric IDs
- Mixing URL patterns inconsistently
- Using underscores instead of hyphens
Neglecting Canonical Tag Implementation
Missing canonical tags create duplicate content issues. Parameter variations, trailing slashes, and protocol differences create multiple URLs for identical content.
Always specify canonical URLs for dynamic routes. Use absolute URLs in canonical tags. Include protocol and domain to avoid ambiguity.
// Correct canonical tag implementation
<link rel="canonical" href="https://example.com/products/running-shoes" /> // Common mistakes to avoid
<link rel="canonical" href="/products/running-shoes" /> {/* Relative URL */}
<link rel="canonical" href="http://example.com/products/running-shoes" /> {/* Wrong protocol */}
Broken Internal Linking
Client-side routing makes internal linking crucial. However, developers sometimes use incorrect link implementations. Always use React Router Link components for internal navigation.
Regular anchor tags trigger full page reloads. This breaks the single-page app experience. Link components handle navigation through React Router properly.
// Correct - using Link component
import { Link } from 'react-router-dom';
<Link to="/products">Products</Link> // Wrong - using anchor tag
<a href="/products">Products</a>
External links should use regular anchor tags. Add target=”_blank” and rel=”noopener noreferrer” for security. React Router links work only for internal navigation.
Forgetting About Mobile Optimization
Mobile-first indexing means Google primarily uses mobile version for ranking. Your React Router implementation must work perfectly on mobile devices.
Test navigation on actual mobile devices. Touch targets should be appropriately sized. Loading performance matters more on slower mobile connections.
Implement responsive design from the start. Viewport meta tags must be present. Test all interactive elements work with touch input.
Overlooking Loading States and Error Boundaries
Poor loading states create bad user experiences. Users see blank screens or janky layouts. Search engines encounter timeouts waiting for content.
Implement proper loading indicators immediately. Use skeleton screens that prevent layout shifts. Error boundaries catch and display failures gracefully.
import { ErrorBoundary } from 'react-error-boundary'; function ErrorFallback({ error }) { return ( <div> <h2>Something went wrong</h2> <pre>{error.message}</pre> <button onClick={() => window.location.reload()}> Reload Page </button> </div> );
} function App() { return ( <ErrorBoundary FallbackComponent={ErrorFallback}> <Routes> {/* Your routes */} </Routes> </ErrorBoundary> );
}
Ignoring Core Web Vitals
Core Web Vitals directly impact search rankings. Largest Contentful Paint measures loading performance. First Input Delay tracks interactivity. Cumulative Layout Shift monitors visual stability.
Monitor these metrics regularly. Use Lighthouse and Chrome DevTools. Real user monitoring provides production performance data.
Large JavaScript bundles hurt LCP scores. Lazy loading helps but must be implemented carefully. Preload critical resources to improve initial loading.
| Metric | Good | Needs Improvement | Poor | Impact |
| LCP | ≤ 2.5s | 2.5s – 4.0s | > 4.0s | Loading performance |
| FID | ≤ 100ms | 100ms – 300ms | > 300ms | Interactivity |
| CLS | ≤ 0.1 | 0.1 – 0.25 | > 0.25 | Visual stability |
Not Testing with Real Search Engines
Local development does not reveal SEO issues. Test your deployed application with actual search engines. Google Search Console provides URL inspection tools.
Submit sitemaps to help search engines discover pages. Monitor crawl errors and fix them promptly. Check that important pages get indexed correctly.
Use the Mobile-Friendly Test tool. Verify structured data with Rich Results Test. These tools show exactly what search engines see.
Failing to Monitor and Iterate
SEO requires ongoing attention. Rankings change over time. Competitors improve their implementations. Algorithm updates shift ranking factors.
Set up analytics tracking properly. Monitor organic traffic trends. Track keyword rankings for important pages.
Regular audits identify new issues. Content grows and code changes. What worked initially may need updates. Schedule quarterly SEO reviews at minimum.
Implementing Your SEO-Optimized React Router Strategy
Optimizing React Router v6 for SEO requires comprehensive implementation. You have learned advanced techniques covering server-side rendering, meta tag management, proper redirects, and performance optimization.
Start with server-side rendering as your foundation. This single change provides the biggest SEO impact. Search engines receive complete HTML immediately. Users see content faster through improved loading performance.
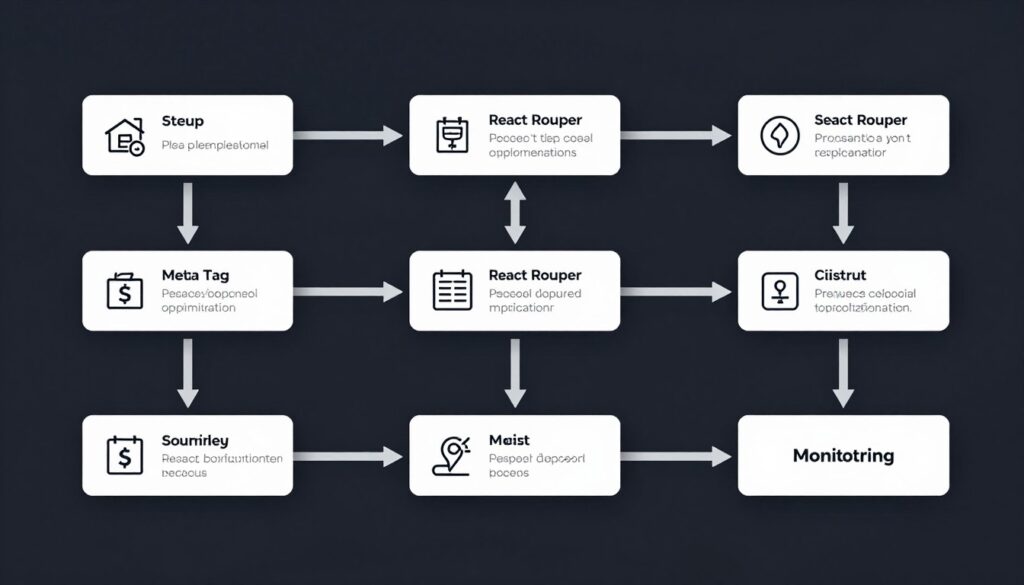
Dynamic meta tags ensure each page presents correctly in search results. Implement React Helmet with server-side support. Include Open Graph tags for social media sharing. Add structured data where appropriate for rich results.
Proper URL structure and canonical tags prevent duplicate content issues. Clean, descriptive URLs improve both user experience and search rankings. Implement redirects for moved content to maintain SEO value.
Your Implementation Roadmap
Follow this sequence for systematic implementation. Each step builds on previous work. This approach minimizes risks while maximizing SEO improvements.
- Set up server-side rendering with your chosen framework
- Implement basic route configuration with proper hierarchy
- Add React Helmet for dynamic meta tag management
- Configure proper canonical URLs for all routes
- Set up 404 handling with correct status codes
Phase 1: Foundation
- Add structured data for rich search results
- Implement lazy loading with performance optimization
- Set up ScrollRestoration for better UX
- Create comprehensive error boundaries
- Configure analytics tracking for all routes
Phase 2: Enhancement
- Optimize bundle sizes through code splitting
- Implement route preloading for common paths
- Add loading states that prevent layout shifts
- Test and improve Core Web Vitals scores
- Monitor search console and fix issues
Phase 3: Optimization
Measuring Your Success
Track specific metrics to evaluate implementation effectiveness. These measurements show real impact on search visibility and user experience.
Technical Metrics
- Time to First Byte under 600ms
- First Contentful Paint under 1.8s
- Time to Interactive under 3.8s
- Total JavaScript bundle under 200kb
- Mobile-friendly test passing
SEO Performance
- Increased organic traffic month over month
- More pages indexed in search console
- Improved average search position
- Higher click-through rates from search
- Reduced bounce rates on landing pages
Staying Current with Best Practices
Web technology and SEO best practices evolve constantly. React Router receives regular updates. Search engines adjust their algorithms. Stay informed about changes affecting your implementation.
Follow the official React Router documentation for updates. Monitor web development communities for emerging patterns. Subscribe to search engine blogs for algorithm news.
Test major changes in staging environments first. Monitor metrics closely after deployments. Roll back quickly if metrics decline unexpectedly.
Get Your Complete SEO Implementation Package
Download our comprehensive React Router SEO toolkit including implementation templates, testing checklists, monitoring dashboards, and code examples for every technique covered in this guide. Plus, get access to our private community for ongoing support and updates.
Common Questions and Next Steps
You now have the knowledge to build SEO-optimized React Router applications. Implementation requires effort but delivers measurable results. Better search visibility drives organic traffic growth.
Start with the highest-impact changes first. Server-side rendering and proper meta tags provide immediate benefits. Then gradually implement advanced optimizations as time permits.
Remember that SEO is a long-term investment. Results take time to materialize. Consistent implementation of best practices yields compound benefits over months and years.
Do I need server-side rendering for good SEO with React Router?
While not absolutely required, SSR provides significant SEO advantages. Google can render JavaScript, but SSR ensures all search engines see your content immediately. SSR also improves Core Web Vitals scores that affect rankings. For maximum SEO effectiveness, implement at least static generation for public pages.
How do I know if search engines are properly indexing my React Router pages?
Use Google Search Console’s URL Inspection tool. Enter your URLs and check the rendered HTML view. This shows exactly what Google sees. Also monitor your site’s index coverage report for errors. Set up regular sitemap submissions to help search engines discover all routes.
Can I use React Router v6 with Next.js for better SEO?
Next.js has its own file-based routing system that handles SEO well by default. You can integrate React Router v6 with Next.js if needed, but it adds complexity. For most projects, Next.js routing alone provides excellent SEO capabilities. Only add React Router if you need specific features not available in Next.js routing.
What is the impact of lazy loading on SEO?
Lazy loading improves initial page load performance, which benefits SEO. However, it must be implemented with SSR for best results. Search engines need to see content immediately. With proper SSR, lazy loading provides performance benefits without SEO downsides. Always test that crawlers see your content in URL inspection tools.
Your React Router application can achieve excellent search engine visibility. Follow the techniques outlined in this guide. Test thoroughly and monitor results. Adjust based on real performance data.
The investment in proper SEO implementation pays long-term dividends. Better search rankings drive sustainable organic traffic growth. Your optimized React Router application will serve both users and search engines effectively.
-

-

-

-