

Web architecture has changed a lot, moving from new ideas to common use. Now, developers focus on making websites fast and safe by separating content management from the user interface. This WordPress Headless with Next.js: Complete Setup Guide for 2026 shows you how to navigate this change.
By splitting your backend from the frontend, you get unmatched performance and flexibility. This method lets your team share content on different platforms while keeping sites fast. It’s not just a trend; it’s the go-to for top-notch digital sites.
Whether you’re growing a business or making a custom app, this guide makes complex tech easier. You’ll see how to use these tools to build a strong, future-ready site that beats the competition.
Table of Contents:
Key Takeaways
- Decoupled architecture makes sites faster and safer.
- Modern stacks make sharing content on various platforms easy.
- Splitting backend from frontend gives more design freedom.
- This method is now key for professional web building.
- Smart use keeps your online presence growing.
Introduction to Headless WordPress and Next.js
Using Headless WordPress and Next.js lets you use WordPress’s power and Next.js’s speed. This new way of building websites separates the content management from the display layer. It changes how developers create digital experiences.
What is Headless WordPress?
Traditionally, WordPress manages both the database and the site’s look. With Headless WordPress, it only handles the database. It shares data through an API, letting you use any frontend framework.
This change means your site isn’t limited by standard themes or page templates. It’s more flexible.
Overview of Next.js Features
Next.js is top for making fast, scalable web apps. This Headless CMS Tutorial shows how the latest version, with Turbopack, is a game-changer.
Turbopack makes builds 2-5x faster, boosting developer work. It also includes features like automatic image optimization and server-side rendering. This keeps your site fast for all visitors.
Benefits of Using Headless CMS
Headless CMS gives your team unmatched flexibility. It lets you pick the best tools for managing content while controlling the UI.
This setup also improves security. The backend is not directly exposed to the public. This Headless CMS Tutorial will guide you in making high-performance apps that grow easily.
| Feature | Traditional WordPress | Headless WordPress |
|---|---|---|
| Frontend Control | Limited by Themes | Full Customization |
| Performance | Dependent on Plugins | Optimized via Next.js |
| Security | Higher Exposure | Isolated Backend |
| Scalability | Moderate | High |
Setting Up Your Development Environment for 2026
Getting your workspace ready is key for a successful 2026 WordPress tutorial. A tidy local environment helps avoid setup mistakes and makes your work flow better. By setting up a strong base now, you make sure your move to a decoupled architecture goes smoothly.
Required Tools and Software
To start, you need specific tools for talking between frontend and backend. Having the right software is crucial for modern web development. Make sure your system is up-to-date for the latest JavaScript frameworks.
Here’s what you should install:
- A modern code editor like Visual Studio Code.
- A reliable terminal or command-line interface.
- A local WordPress development environment such as LocalWP or XAMPP.
- The latest stable version of a web browser for debugging.
Installing Node.js and npm
Node.js is the engine that powers your frontend app. It lets you run JavaScript outside the browser, key for Next.js development. You also need npm, the package manager, for managing project dependencies.
“The secret of getting ahead is getting started.”
Using a version manager like nvm is a good idea. It lets you easily switch versions if needed. Always check your version with a command in your terminal to make sure it’s correct.
Setting Up WordPress for Headless
With your local environment set up, you need to make WordPress a pure API backend. This is a key part of a Headless CMS tutorial. Make sure the REST API is open and your permalinks support clean data fetching.
Security and performance are critical at this stage. Remove unnecessary themes and plugins to make a fast backend. This setup lets you focus on a top-notch frontend experience for your users.
Configuring WordPress as a Headless CMS
This 2026 WordPress tutorial will show you how to set up your backend for a headless system. Moving to a headless setup changes how you host and configure WordPress. It’s key for success.
Your backend needs to be optimized for high-performance API requests, not just for pages. This lets your frontend get data fast, making the user experience smooth.
Choosing the Right Hosting Provider
Finding a hosting provider that gets headless architecture is essential. Shared hosting often can’t handle the API calls well.
Kinsta or Cloudways are great because they’re made for high-traffic sites. They keep your server fast, which is important for a quick frontend.
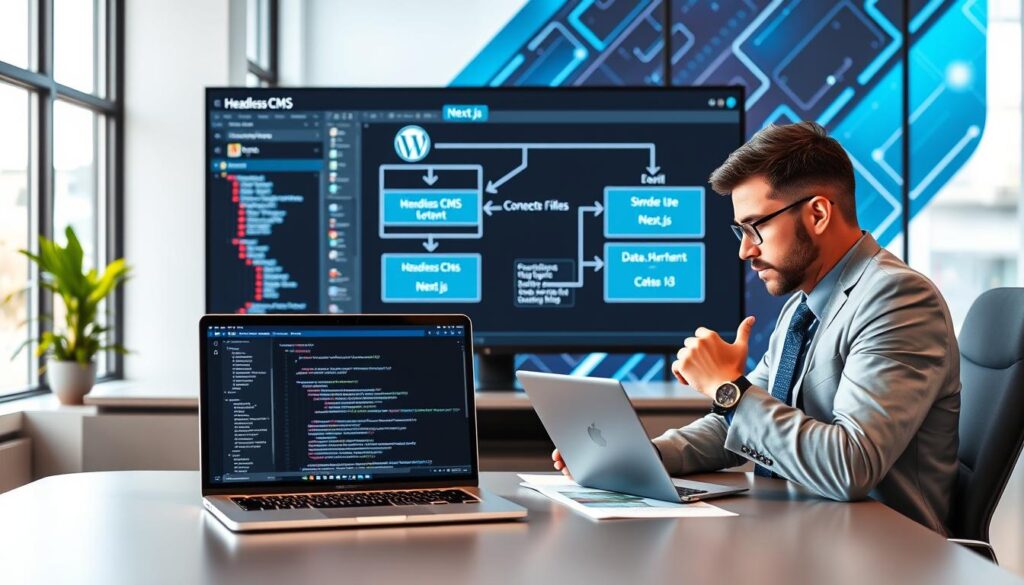
When picking a provider, look for strong caching and API support. The table below shows important features to consider.
| Feature | Standard Hosting | Headless Optimized |
|---|---|---|
| API Response Time | Moderate | Ultra-Fast |
| Caching Strategy | Page-based | Object/API-based |
| Scalability | Limited | High/Elastic |
| Security Focus | General | API-Specific |
Installing REST API Plugins
To share your content with a frontend, you need to organize your data right. Using the WPGraphQL plugin is key in this 2026 WordPress tutorial. It makes your data easy to query and efficient.
This plugin turns your WordPress into a strong GraphQL API. It lets your frontend get just the data it needs, making things faster and lighter.
Customizing WordPress Settings
Configuring WordPress settings is the last step for a secure headless setup. Start by tweaking your permalink settings to keep API endpoints clean and easy to predict.
Also, check your API access permissions to keep data safe. Disabling extra features and tightening security makes your headless project strong and fast.
Creating Your Next.js Application
Starting a frontend project with Next.js is key. It makes your site fast, scalable, and easy for developers. This is true from the first line of code.
Setting Up Your Next.js Project
First, open your terminal and use the standard command to start. This command creates a new directory and installs the essential files for a Next.js site.
Choosing TypeScript and ESLint by default helps keep your code quality high. After installation, go into your new folder. Start the development server to check if everything works well.
Project Structure Overview
A good project structure is important for easy maintenance. In a Next.js setup, you’ll see folders for different tasks:
- /components: These are reusable UI parts like headers and footers.
- /lib: Here, you’ll find utility files for API calls and data fetching.
- /pages: This folder handles your website’s routing system.
- /styles: It’s for global CSS or module files to keep your design consistent.
“A clean folder structure is the hallmark of a professional developer. Keep your logic separated from your presentation to ensure your codebase remains readable as it grows.”
Adding Dependencies for Headless CMS
To link your frontend to WordPress, you need specific libraries for data requests. Most developers use a GraphQL client for efficient content fetching.
Use this command to add the needed tools to your Next.js project:
- Apollo Client: A powerful library for managing GraphQL data.
- Dotenv: Essential for managing your API keys and environment variables securely.
- Axios: A reliable alternative if you prefer REST API calls over GraphQL.
Always keep your sensitive API endpoints in a .env.local file. This keeps your credentials safe and prevents leaks during deployment.
Connecting WordPress to Next.js
Connecting your WordPress backend to a modern frontend is exciting. It lets your Next.js app get content easily. This makes your site fast and powerful.
Fetching Data from WordPress REST API
The WordPress REST API is key for your data. You can use fetch or Axios to get posts and pages. With Next.js, you fetch data during the build or at runtime.
Start by setting up your base URL and endpoint paths. This keeps your code organized. Make sure to handle API errors well to avoid problems.
Understanding GraphQL vs REST
Choosing the right data fetching method is important. REST is simple, but GraphQL gives more control. Here’s a table to help you choose the best for your Next.js project.
| Feature | REST API | GraphQL |
|---|---|---|
| Data Fetching | Multiple endpoints | Single endpoint |
| Payload Size | Fixed structure | Customized per request |
| Learning Curve | Low | Moderate |
Managing Authentication and Security
Security is critical when sharing your content. Use Abilities API tokens for secure authentication. This keeps your data safe in your Next.js app.
Don’t put secret keys in your frontend code. Use environment variables to keep them hidden. This way, your data stays protected from unauthorized access.
Building Your First Page with Next.js
Creating your first page in Next.js is a big step in web development. It shows how your WordPress content turns into a fast, modern site. Next.js makes this possible by handling different ways to render content well.
Creating a Static Page
A static page is a great starting point. In Next.js, you make these by adding a file in the pages directory. Each file becomes a route based on its name, making your site easy to organize.
You can use React components to design your UI. This makes your content load fast because the HTML is ready at build time. It’s perfect for pages that don’t change much, like “About” or “Contact” pages.
Using getStaticProps for Data Fetching
To get content from WordPress, use the getStaticProps function. This feature fetches data before building your pages. This way, your pages are ready with the latest info.
When you export this function, Next.js runs it before showing your page. You can then use the fetched data in your page. This method gives a seamless user experience by serving static files directly.
Implementing Dynamic Routes
For complex sites, you might need pages that share a layout but show different content. Use bracket notation in your filenames, like [slug].js. This tells Next.js to treat that part of the URL as a variable.
By using dynamic routes with getStaticPaths, you can create many pages from one template. This makes it easy to manage lots of content without manual effort. It’s a highly efficient way to handle large content.
| Rendering Method | Best Use Case | Performance |
|---|---|---|
| Static Generation | Landing Pages | Very High |
| Dynamic Routes | Blog Posts | High |
| Server-Side Rendering | User Dashboards | Moderate |
Learning these basics will help you build strong apps. As you get better with Next.js, you’ll see these patterns are key for many features.
Styling Your Next.js Application
Designing a beautiful interface is the final piece of your WordPress Headless Setup. The backend handles data, but the frontend shows how users interact with it. A polished design makes your site look professional and trustworthy.
Choosing a CSS Framework
Choosing the right tool for styling can speed up your development. Many prefer utility-first frameworks like Tailwind CSS for quick prototyping. CSS-in-JS libraries also offer dynamic style management.
When picking for your WordPress Headless Setup, think about learning curve and size. A lightweight approach improves performance, which is key for modern web standards.
Adding Global Styles
Global styles are the foundation of your website’s look. Define your typography, color palettes, and layout resets in one file. This ensures consistency on every page.
In Next.js, import these styles into your _app.js or layout.js file. Keeping these rules global helps maintain a unified design language across your project.
Styling Components in Next.js
Styling components prevents style conflicts as your project grows. CSS Modules let you scope styles to specific components. This way, your button styles won’t affect your navigation or footer.
The following table compares popular styling methods to help you decide which fits your workflow best:
| Method | Performance | Ease of Use | Best For |
|---|---|---|---|
| Tailwind CSS | High | Fast | Rapid UI Development |
| CSS Modules | High | Standard | Scoped Component Styling |
| Styled Components | Medium | Advanced | Dynamic Theming |
By choosing the right approach, your WordPress Headless Setup stays maintainable and visually striking. Always focus on clean code and modular design for scalability.
Implementing Advanced Features
As your project grows, you’ll need to add more advanced tools to stay ahead. A top-notch WordPress Headless Setup means moving past simple static sites. It’s about handling complex user interactions and big data well.
Adding Server-Side Rendering (SSR)
Server-Side Rendering (SSR) makes your site generate HTML on the server for each request. It’s essential for pages needing real-time data, like user dashboards or live inventory updates.
SSR makes sure search engines get fully rendered content right away. This boosts your SEO compared to client-side rendering, which can struggle with dynamic content.
Pagination and Filtering of Content
Handling lots of content is a big challenge as your site grows. Robust pagination keeps users from getting lost in long lists of posts or products.
Adding filters helps visitors find what they need. By using query parameters, you can fetch specific data, keeping your WordPress Headless Setup fast and efficient.
- Use URL query parameters for state management.
- Implement “Load More” buttons for a smoother user experience.
- Create category-based filters to improve site navigation.
Handling Image Optimization
High-resolution images can slow down your site if not optimized. Using modern formats like WebP and lazy loading are critical for a fast site.
Next.js has a built-in Image component that resizes and optimizes your images. This ensures users get the smallest file size without losing quality.
| Feature | Performance Impact | Implementation Difficulty |
|---|---|---|
| Server-Side Rendering | High | Moderate |
| Pagination | Medium | Low |
| Image Optimization | High | Low |
| Advanced Filtering | Medium | Moderate |
Testing Your Application
Quality control is key for a successful WordPress Next.js integration. A good testing plan keeps your site stable, secure, and fast for all visitors.
Setting Up a Testing Environment
You need a reliable local environment that matches your production site. Jest is a top choice for JavaScript tests. Playwright is great for automating browser tests.
Setting up these tools early helps avoid costly bugs on your live site. Create a testing folder in your project to keep tests organized and separate from your main code.
Writing Unit and Integration Tests
Unit tests check individual functions, making sure data fetching works right. These tests lay a strong foundation for your WordPress Next.js site.
Integration tests look at how different parts of your app work together. Focus on testing key areas like form submissions and dynamic content. This ensures a smooth user experience.
Performance Testing and Optimization
Speed is important for keeping users and improving search rankings. Use Google Lighthouse to find and fix performance issues.
Work on optimizing images and reducing JavaScript bundles to boost your site’s speed. Regular checks help keep your code high-quality and user-friendly.
Deploying Your Next.js Application
Deployment is the last step from local to live site. It’s about picking the right infrastructure and automating your workflow. This ensures your WordPress Next.js Integration works well for everyone.
Choosing a Cloud Hosting Service
Finding the right platform is key for your site’s speed and reliability. Vercel is a top pick for Next.js because it supports it well and has a global network. Other options like Netlify or AWS Amplify also help your site grow.
Preparing for Deployment
Before going live, check your environment variables. Make sure API keys and database connections are safe in your hosting’s dashboard, not in your code. This is vital for a good WordPress Next.js Integration.
Also, review your build commands to meet your project needs. A local production build can spot issues before they hit your site. Testing your build process early avoids downtime and keeps users happy.
Setting Up Continuous Integration/Continuous Deployment (CI/CD)
Automating your deployment saves time and cuts down on mistakes. Tools like GitHub Actions can start a new build with each code push. This keeps your WordPress Next.js Integration fresh with the latest updates.
A good CI/CD pipeline also tests before deploying. If a test fails, it stops the deployment. This protects your site from bad code. Investing in automation keeps your site professional and reliable.
Maintaining Your Headless WordPress Setup
A successful headless WordPress project needs regular care and watchful eyes. The setup’s flexibility comes with a big responsibility for your team. By sticking to a routine, you keep your site safe and fast for users.
Regular Backups and Updates
Your WordPress backend is the truth for your content. Daily backups of your database and media are essential to avoid data loss. Make sure your backups work before you need them.
Keeping your WordPress and plugins up to date is key. With headless WordPress, make sure your REST API or GraphQL plugins match the latest WordPress versions. Test updates in a staging site to avoid problems in your live site.
“Maintenance is not a chore; it is the foundation of a reliable digital experience. A well-maintained system is a secure system.”
Monitoring Performance and Security
Watch your site with two eyes: the WordPress backend and the Next.js frontend. Use tools like New Relic or Datadog to check API speeds and find slow spots. Slow headless WordPress often means bad database queries or missing caches.
Security is critical when sharing content through APIs. Scan your site often for weaknesses and protect your API with strong tokens. Keep your environment variables safe and change your API keys often to lower your risk.
Troubleshooting Common Issues
Even with great planning, you might hit technical bumps. Issues like CORS errors, failed API calls, or old content on the frontend can happen. First, check your server logs to see if the problem is with WordPress or Next.js.
The table below shows important maintenance tasks to keep your project smooth:
| Task Category | Frequency | Primary Goal |
|---|---|---|
| Database Backups | Daily | Data Recovery |
| Plugin Updates | Weekly | Security Patches |
| API Performance Audit | Monthly | Speed Optimization |
| Security Scans | Monthly | Vulnerability Detection |
By doing these tasks, you keep your headless WordPress setup strong. Regular updates and quick fixes make your site a reliable tool for your business.
Future Trends in Headless WordPress and Next.js
The mix of content management and modern frontend frameworks is changing fast. Developers are using Headless WordPress to make websites faster, safer, and more personal. Keeping up with these changes helps your projects stand out online.

Emerging Technologies to Watch
AI agents are set to change how we publish content. They can tag posts, improve media, and suggest site changes. This means less work for you and better sites for everyone.
Edge computing is also big news. It makes content load quickly, no matter where you are. This makes Headless WordPress even more powerful for reaching people worldwide.
The Role of Jamstack in Web Development
The Jamstack is now key for fast, secure websites. It separates the frontend from the backend, giving developers more control. This setup makes sites safer and easier to scale.
- Performance: Pages load fast because they’re pre-rendered.
- Security: Fewer server-side tasks means less risk of attacks.
- Scalability: Networks handle big traffic without trouble.
Preparing for APIs and Headless Solutions
To stay ahead, focus on building clean APIs. These should work with many frontends, from websites to apps. This flexibility is key for Headless WordPress success.
The table below shows how to move from old methods to new, better ones for your projects.
| Feature | Legacy Approach | Future-Proof Strategy |
|---|---|---|
| Content Delivery | Server-side rendering | Edge-based static generation |
| Security | Plugin-heavy patching | API-first isolation |
| Workflow | Manual updates | AI-driven automation |
| Scalability | Vertical scaling | Global CDN distribution |
By following these trends, your setup will stay strong. Continuous learning and being adaptable are vital for success in this fast-changing field.
Conclusion: Embracing Headless WordPress with Next.js
Building a fast site means changing how you manage content and deliver the frontend. This guide for 2026 shows how to mix WordPress’s flexibility with Next.js’s speed.
Key Takeaways for Developers
Success comes from separating your backend from your frontend. Using the WordPress REST API or GraphQL gives you full control over your site’s structure. This makes your app fast, secure, and grows with your needs.
Strategies for Long-Term Success
Use strong caching to keep your site fast, even when many people visit. Set up automated CI/CD workflows with tools like Vercel or GitHub Actions. These steps keep your site running smoothly while you work on making it great for users.
Resources for Continued Growth
Keep learning by checking out Next.js’s official docs and the WordPress developer blog. Join communities on Stack Overflow or GitHub to quickly get help with tough problems. Now, you have the skills to set up a top-notch digital project for 2026.